
Have you ever wondered how to reset your Shark Robot Vacuum? Well, if you’ve been asking yourself this question then you’re in luck! In this article, we will discuss the necessary steps to resetting your Shark Robot Vacuum. Let’s dive in and explore how easy it can be.
Are you tired of the same old mundane chores around the house? Have you ever thought that there must be a better way? The good news is that with a Shark Robot Vacuum, life at home can become much simpler. Now all you need to know is how to reset it. That’s where we come in!
How To Reset Shark Robot Vacuum
No longer do you have to search endlessly for answers. With our help, you will soon be on your way to resetting your Shark Robot Vacuum in no time at all. So what are you waiting for? Come along with us and let’s take the first step towards a more efficient and stress-free life at home!
Unplugging The Shark Robot Vacuum
Unplugging the Shark Robot Vacuum is a sure-fire way to reset it. Picture in your mind a futuristic world, where robotic vacuums rule the lands. As much as these robots are helpful and necessary, sometimes they need a reset. That’s where unplugging comes in: an easy solution to any tech hiccups.
The first step is to locate the power cord of the Shark Robot Vacuum and unplug it from its electrical source. Make sure you do this carefully as not to damage any cords or connections in the process. Once you’ve disconnected the cord, wait for at least 30 seconds before plugging it back in again. This will give enough time for the robot vacuum to reset itself properly, allowing you to access its reset button without worry.
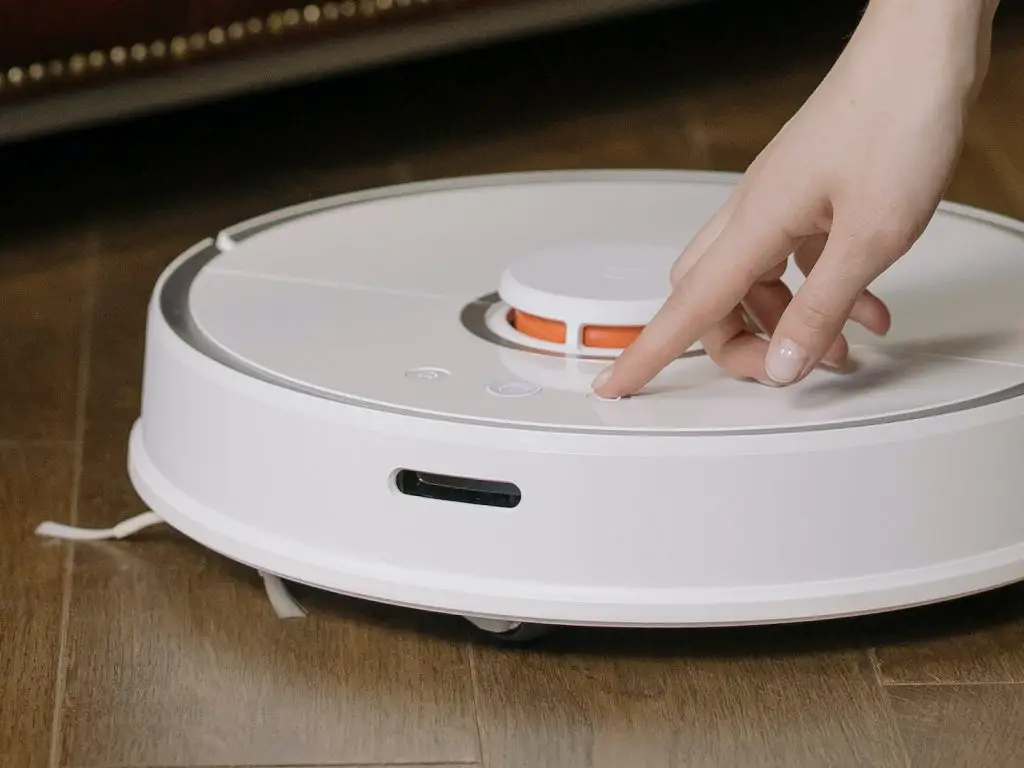
Accessing The Reset Button
Unplugging your Shark robot vacuum is only the first step in resetting it. Next, you’ll need to access the reset button. But where is it located?
Don’t worry, finding the reset button is actually quite simple. It’s usually found on the bottom of the vacuum, near where the dust bin attaches. Once you’ve located it, press and hold down the button for a few seconds until a light appears on your vacuum’s display panel—this will indicate that your Shark robot vacuum has been successfully reset!
Now that you’ve accessed and triggered the reset button, we can move onto performing a soft reset. This process requires taking a few more steps to ensure your Shark robot vacuum is ready for cleaning again.
Performing A Soft Reset
Putting two and two together, it’s time to perform a soft reset on your Shark robot vacuum. This process is relatively straightforward, but should be done with caution. To begin, you’ll need to locate the reset button on the underside of the vacuum.
Once you’ve located it, press and hold the reset button for at least 10 seconds. This will initiate a soft reset, which will clear out any stored data in your Shark robot vacuum. After that, you can use it as normal – just make sure to give it a few minutes before starting it up again so that everything has time to properly sync up.
Performing A Factory Reset
Finally, if all else fails, you may need to perform a factory reset. This is the most drastic solution and can be incredibly intimidating, but it’s also incredibly effective. To start the process, first switch off your Shark Robot Vacuum and unplug it from the power outlet. Once that’s done, press and hold down both the ‘Spot’ and ‘Max’ buttons on your vacuum for 10 seconds. Then release both buttons simultaneously and plug your vacuum back in. When you turn it back on, you’ll know that it has successfully been reset as the lights will flash twice before turning off again.
This will take your Shark Robot Vacuum back to its original factory settings so any problems or changes you’ve made will be erased. A factory reset should always be used as a last resort since it can affect how well the vacuum operates and its general performance. However, if you find yourself stuck with an issue that just won’t go away then a factory reset may be exactly what you need to get your vacuum up and running again.
Troubleshooting Power Issues
Fixing power issues with your shark robot vacuum can be like a game of whack-a-mole. You solved one problem only to have another pop up. But don’t worry, you are not alone in this struggle. We are here to help you get through it!
First and foremost, check that the charging station is powered on and plugged into an active outlet. Ensure that there is nothing obstructing the connection between the charging pins and the robot, such as debris or dust. If you have checked all of these things and still have power problems, then it’s time to reset your Shark Robot Vacuum.
Reset it by holding down both buttons on the top of the unit for 10 seconds until you hear a beep sound—this will restore it to its factory settings. After resetting, place your shark robot vacuum on its charging station for at least 3 hours before using again so that its battery can fully charge.
Now that you’re done troubleshooting power issues, it’s time to move onto clearing the brush roll and wheels.
Clearing The Brush Roll And Wheels
Having power issues with your Shark robot vacuum is one thing, but having to clear the brush roll and wheels is a completely different experience. It takes a lot of patience and care to ensure that the vacuum is performing optimally.
Fortunately, cleaning the brush roll and wheels on a Shark robot vacuum isn’t too difficult. With just a few simple steps, you’ll be able to get your device back up and running in no time. First, make sure that the power switch is off before attempting any maintenance. Then remove any debris from the brushes and wheels using a soft-bristled brush or vacuum attachment. To remove more stubborn dirt, use warm water and mild detergent with a damp cloth. When finished, dry all components thoroughly before reinstalling them in their original locations. To complete the process, simply turn on the power switch and test out your newly cleaned Shark robot vacuum!
By following these steps carefully, you can easily ensure that your Shark robot vacuum runs at its best every day – so you can enjoy clean floors without hassle!
Cleaning The Vacuum Sensors
John, a robot vacuum owner, had been struggling to reset his shark robot vacuum. After clearing the brush roll and wheels of any debris, John was ready to move on to the next step: cleaning the sensors.
Sensor cleaning is an important part of maintaining a robotic vacuum. The sensors are responsible for detecting obstacles and surfaces that need to be cleaned. If these sensors get dusty or dirty, it can affect the performance of the vacuum and even cause it to malfunction. To clean the sensors, John needed a soft cloth dampened with water and mild soap. He then wiped down each sensor gently until all dust and dirt were removed.
Once he was finished, John felt confident that his robot vacuum was up-and-running again. He was now ready to reinstall the battery and get back to cleaning his home with ease.
Reinstalling The Robot Vacuum’s Battery
Reinstalling the robot vacuum’s battery requires patience and precision. Taking the time to do it right the first time will ensure optimal performance.
Begin by turning off the power switch, unplugging the unit, and removing the cleaning brush and dust bin. Then, carefully remove the bottom plate from the vacuum body. Locate the battery compartment and release it from its holders before disconnecting it from its wires. Carefully lift out the old battery, set aside for disposal, and replace with a fresh one. Reconnect to its wires and secure back in place. Reattach the bottom plate to finish installation of your new battery.
Once your new battery is installed, you are ready to verify that your shark robot vacuum is functioning properly.
Verifying The Vacuum Is Functioning Properly
It’s time to put your shark robot vacuum to the test and make sure it’s functioning properly. Now that you’ve reinstalled the battery, it’s time to give it a try. If all has gone according to plan, your little robot should be whirring away just like before.
To check that everything is working as intended, you’ll want to put the vacuum through its paces. A few trial runs around your home will do the trick. Pay close attention to how it navigates obstacles and cleans up debris. Once you’re satisfied with the results, then you can rest assured that your robot vacuum is back in business!
Now that you’ve successfully reset your shark robot vacuum, it’s time to shift focus towards ensuring optimal performance in the long-term. With a few simple maintenance tasks, you can keep your vacuum running like new for years to come.
Maintaining The Robot Vacuum For Optimal Performance
Maintaining a robot vacuum is essential for keeping it operating at its peak performance! It’s a surprisingly simple task that can make all the difference, and it doesn’t even need to take long. With just a few quick steps, you’ll be able to keep your robot vacuum in tip-top shape for years of hassle-free cleaning.
To start, always empty the dirt cup after each use. This will help ensure that your machine isn’t weighed down with too much debris and can maintain optimal suction power. You should also clean the filter regularly — it only takes a few minutes and will help prevent dust buildup in the motor. Additionally, wiping down the exterior of the vacuum with a microfiber cloth can help keep it looking like new.
Finally, check your owner’s manual for any other maintenance tips specific to your model of robot vacuum. Taking care of your machine now will save you time and money in the future — and who doesn’t want that? Keeping up with regular maintenance means no more surprise breakdowns or expensive repairs — just reliable cleaning performance day after day!
Frequently Asked Questions
How Often Should I Perform A Factory Reset?
Resetting your Shark robot vacuum is a great way to ensure it’s running optimally. It’ll help keep your floors spick and span, too! But how often should you perform a factory reset?
The answer depends on how much use your Shark robot vacuum gets. If you have a high-traffic home, you’ll want to reset it every few months. That way, the memory won’t become overloaded and the vacuum will continue to work correctly. On the other hand, if your vacuum is operating in a low-traffic area, then you can probably go longer between resets. Either way, it’s important to give it a fresh start every now and then – that’ll keep it working at its best!
Resetting your Shark robot vacuum isn’t hard – in fact, it only takes a few minutes. So why not set aside some time for this task? You’ll be glad you did when you see the results!
Is It Possible To Reset The Shark Robot Vacuum Without Unplugging It?
Resetting a Shark robot vacuum can be like opening a new door of possibilities. It’s an exciting process that can help restore your trusty device to its original condition. But is it possible to reset the Shark robot vacuum without having to unplug it?
The good news is that, yes, there are ways to reset your Shark robot vacuum without having to unplug it. You don’t have to worry about losing power or disrupting any settings – you just need to know the right steps. Depending on your model, you may need to press and hold certain buttons or use voice commands. You may also need to access the device’s settings through an app on your smartphone or tablet.
By following these simple instructions, you can keep your Shark robot vacuum running smoothly and efficiently day in and day out – no matter how many times you need a reset!
What Type Of Maintenance Is Required To Keep My Shark Robot Vacuum Running Optimally?
As the age-old proverb goes, ‘a stitch in time saves nine.’ This is especially true when it comes to maintaining your Shark Robot Vacuum. To keep your robot vacuum functioning optimally, it requires regular maintenance. In other words, a little effort now can save you tons of trouble later on!
To begin with, it’s essential to regularly empty the dust bin. A full bin will cause the vacuum to work harder and reduce its performance over time. Additionally, you should check and clean filters every 3 months or so. This will help maintain its suction power and keep the air in your home free from allergens. Furthermore, if there are any blockages or clogs in the brushes or wheels they should be cleared immediately before they cause too much damage.
Finally, don’t forget to clean off dirt and debris from the exterior of your Shark Robot Vacuum every now and then. Taking a few minutes out of your day for basic maintenance may not seem like a lot of fun at first glance; however, it can make all the difference in how long your vacuum runs smoothly and efficiently!
How Do I Know If The Reset Has Been Successful?
It’s important to ensure that your Shark Robot Vacuum is running optimally. But what if a reset is needed? Resetting can be a tricky process, so it’s understandable to wonder if the reset has been successful.
The good news is that there are some simple steps you can take to make sure the reset has been successful. First off, check the LED light on the vacuum – if it’s green, then the reset was successful. If not, try unplugging the vacuum and plugging it back in again. It may also help to manually turn it off and on again. If all else fails, contact customer support for assistance.
Knowing that your Shark Robot Vacuum has been successfully reset will give you peace of mind that your vacuum is running at peak performance. So don’t hesitate to take the extra steps to confirm that your reset was successful – it could save you time and hassle in the long run!
Is There A Way To Increase The Vacuum’s Battery Life?
At the outset, it’s important to note that there are some steps you can take to increase the battery life of your Shark robot vacuum. While this may not be an immediate solution to resetting your vacuum, it’s still worth exploring as a way to ensure you get the most from your appliance.
The first thing to do is make sure you’re cleaning regularly with the vacuum and emptying out its dust cup often. Additionally, make sure to clean or replace the filters regularly too, as they can become clogged with dirt and dust – both of which can reduce suction power and therefore battery life. Moreover, check for any blockages in the brushes or hoses that could be preventing a proper clean and draining the battery faster than necessary. Finally, if you find yourself needing to charge your vacuum more often than normal consider investing in an extra battery so you can keep on vacuuming without interruption.
These simple measures will help extend the life of your Shark robot vacuum and ensure you get many years of reliable use out of it. Taking a little extra time now to care for your appliance will go a long way towards making sure it continues providing excellent cleaning performance for years to come!
Conclusion
It’s easy to get overwhelmed by the thought of resetting a Shark Robot Vacuum, but with the proper knowledge and maintenance, it doesn’t have to be a daunting task. The key is to understand everything that goes into keeping your Shark Robotic Vacuum running optimally. With an understanding of how often you need to perform a factory reset, how to do it without unplugging it, and what kind of maintenance is needed to keep it running like new, you can ensure that your vacuum is ready when you need it. Plus, if you’re looking for ways to increase its battery life, there are plenty of affordable tips and tricks out there that you can use. So don’t sweat the small stuff – just put on your detective hat and get to work! And remember – even if something doesn’t seem logical at first glance, take a second look – you never know what piece of wisdom from yesteryear might come in handy!